The Spice of Life – Adding a Spice Orange GameCube to my Collection
My birthday came early this year. Abby has had a rather gracious track record of letting me buy what I want before my birthday. Usually because I find something I’ve wanted for years on eBay that adds some sort of time crunch. If I could only wait until June…
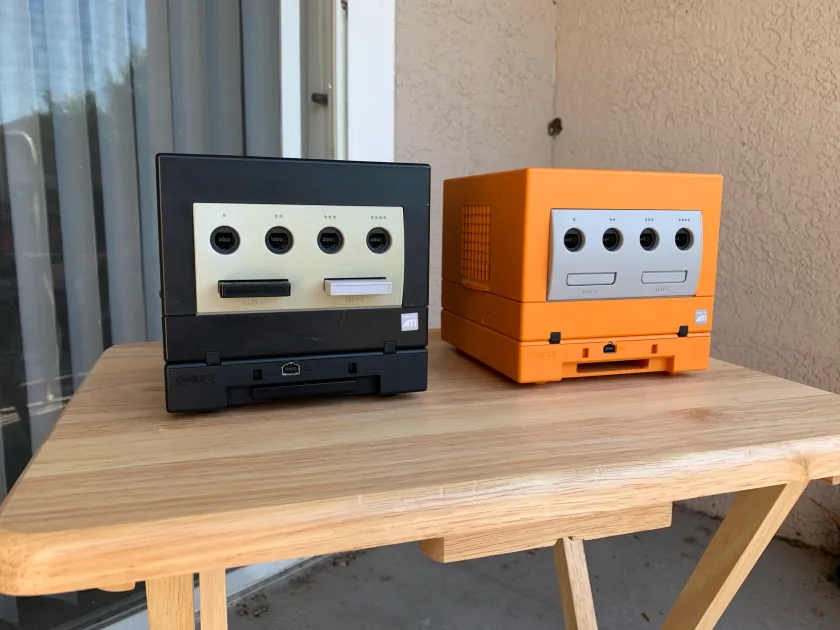
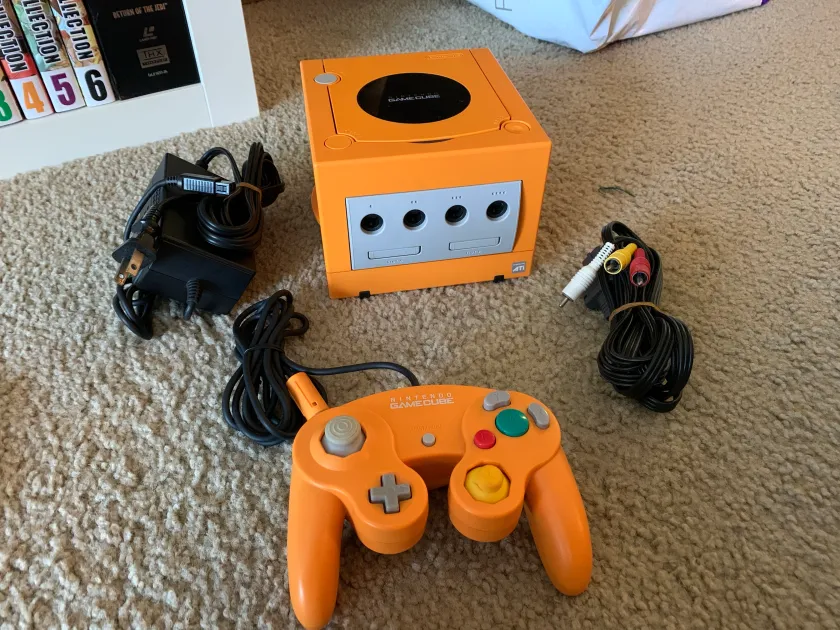
Anyway, my present showed up last week all the way from Japan. I finally have my own Spice Orange GameCube! I have always wanted this variant of my favorite Nintendo home console. It is so slick and just pops! Totally catches your eye. I bought the set-up piece meal, instead of all-in-one order. I got the GameCube and controller together, while I ordered the Game Boy Player separately. Abby even let me buy a matching Spice Orange Game Boy Advance, which is currently on a boat (I think).
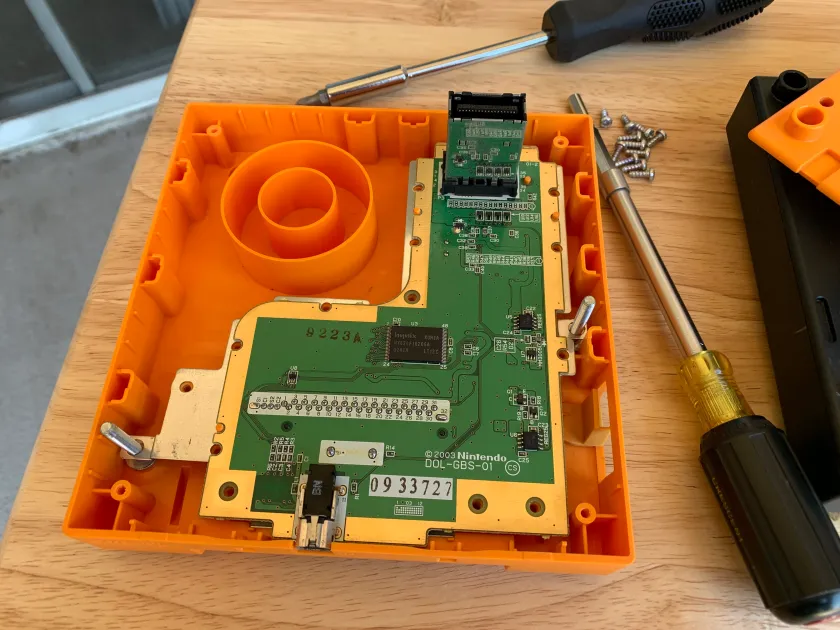
When I took the GameCube out of its packaging, it was in great shape. It was wrapped in its own sleeve of bubble wrap. The outer shell looked great and even the front plate hadn’t suffered terrible yellowing over the years. Then I pressed the “Open” button. My newly acquired birthday present had a gummy “Open” button. Thankfully, I had watched a few tear down videos while waiting for the shipment. I was considering swapping the guts of a US console with the Japanese guts inside this Spice Orange console (but have since decided against it) and I wanted to be educated. It only took two types of screwdrivers, both of which I had.
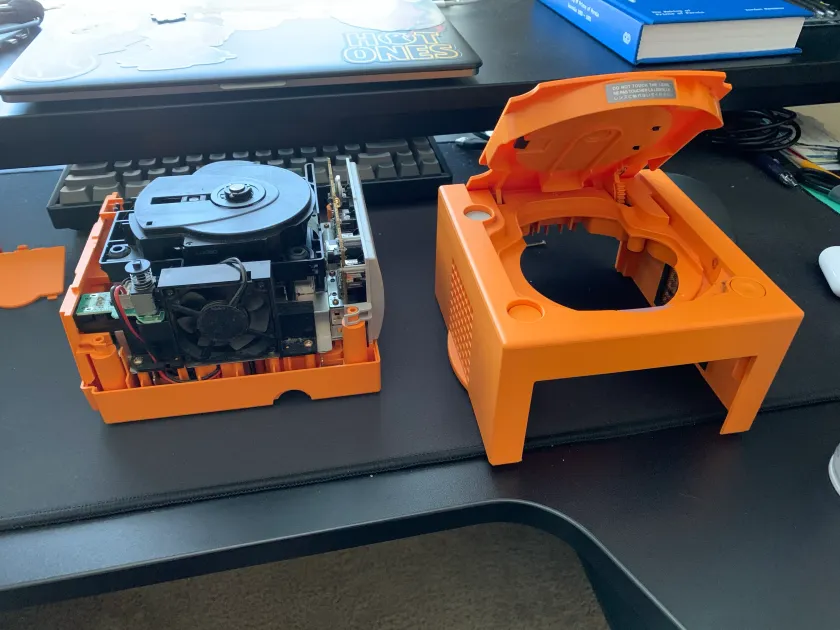
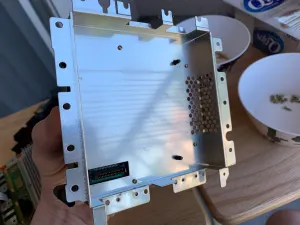
Gummy, gunk-filled “Open” buttons is a semi-typical issue with GameCube consoles. Thankfully, all I needed to do was remove the screws on the bottom of the console and the outer shell slid right off. The “Open” button is right there and i was able to pop it out and remove the build-up of gunk. But while the GameCube was open, I noticed all the dust and hair the had collected inside. I already had it open, might as well clean it all.
All that is required to lift the main guts off and over the heat sink and motherboard is removing 18~ Phillips head screws. Some are tucked underneath the fan and there a four longer, skinner ones behind the memory card slots, but all things considered, it is an easy tear down. I used cotton swaps with isopropyl alcohol to clean off areas with caked on dirt and grime. I wanted that spice orange color to shine. Once I removed all the screws I was able to use my trusty can of air to blow off all the dust to make sure it didn’t too toasty inside my new GameCube.
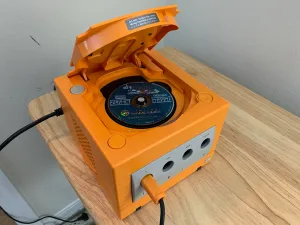
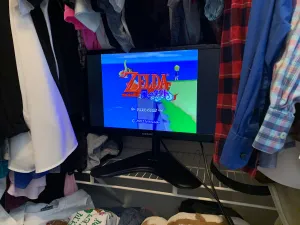
I took it back inside and hooked it up to my small TV with the EON GCHD-MKII and my US power supply. People online claim it is cool to use the Japanese power supply, but I didn’t feel like that was the safest thing. Currently, the monitor is in my closet (a story for another time), so the set-up was a bit awkward. I grabbed my Japanese copy of Wind Waker and booted it up. The game looked absolutely gorgeous, both inside the GameCube and on the screen. No Action Replay required to play a region-locked disc on a US system. That’s why I decided against swapping the internals. I could play my small Japanese collection with no fuss and my US system still works perfectly. Speaking of which, I decided to see how dusty my childhood GameCube was.

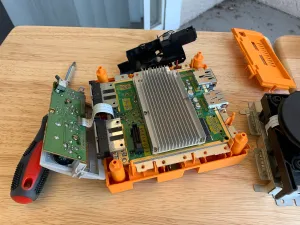
Yikes. I was already in the “disassemble GameCube and clean it” mindset. So I took it apart as well and really cleaned it out well. That dust has been built up over almost 20 years.
Later in the day, the Game Boy Player arrived as well. Unlike the main console, the Game Boy Player is not region-locked, likely due to the fact that the Game Boy itself was not. The unit had some gunk stuck to the side near the ejection trigger, so I scrubbed that off with a wipe and then some cotton swaps. I attached it to the bottom of the Spice Orange GameCube and it looked perfect. Childhood Max’s dream come true.
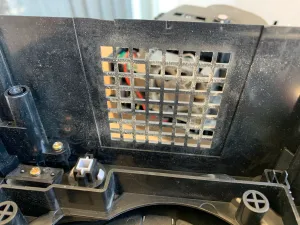
The next day, I wanted to make sure that the Game Boy Player actually worked though. So I swapped it to the bottom of my US Game Cube where I could use either the official software or the Game Boy Interface to test it out. The first game I tried was Minish Cap and it did not boot properly. Not a good sign. I then tried Link’s Awakening, Castlevania: Aria of Sorrow, and Super Mario Bros. 3: They all worked correctly. I also tried a Game Boy game—Super Mario Land 2—and it did not load. So I grabbed my Game Boy Micro to test Minish Cap. It didn’t work, so I knew that the game was the problem there. I cleaned the contacts and it worked in the Micro, but it still would not load in the Game Boy Player. The eject trigger was also not removing the cartridges all the way with that satisfying launch. I was worried that maybe the external gunk and gotten inside and was messing with the eject mechanism and possibly the cartridge slot itself. So I decided to take it apart as well.
This was a bit more frustrating. Not due to the ease of access, still had the required screwdrivers, but just my lack of paying attention to screw placement. Plus, I hadn’t had the best breakfast and was on the phone while trying to do this. My bad. There was no gunk inside the unit or anything visible that would interfere with the cartridges. The only possible area that could have any issue now is the actual cartridge slot and I don’t have the tools for cleaning that yet. I put it all back together and place it back underneath the new GameCube.
In the end, I am super happy with the present. It is exactly what I wanted! I now have two perfectly working DOL-001 GameCubes in the colors I like the most for the system. I have a much simpler way to play the few Japanese games I own and I have a great condition GameCube controller, which is the best controller ever. I am super happy with it all. I can’t wait to get the Spice Orange Game Boy Advance to complete the set! Thanks Abby! 26 has never looked so spicy (or orange).